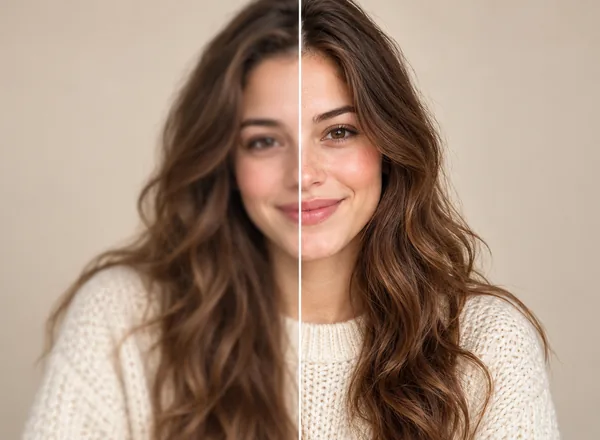


The photo looked fine. That’s the thing. On my phone, zoomed in even, the picture of my grandparents looked completely printable. I’d pulled it from a family WhatsApp group, which I now know was mistake number one. Eighteen dollars and one trip to the print shop later I was holding what can only be described as a mosaic. Blocky faces. Fuzzy everything.
The problem, it turns out, has a name, and once you understand it the fix is usually pretty simple. So here’s the whole thing, everything I figured out after that failed print, written down so you don’t have to learn it the eighteen-dollar way.
What image resolution means (the short version)
A digital photo is a grid of colored dots. Pixels. And a printer, when you hand it your file, converts those dots into ink on paper, basically one for one. So if the file doesn’t have many dots to begin with, the printer stretches what’s there across the paper and the gaps show. That’s your blur. That’s your blocky squares.
People throw around two acronyms here, PPI and DPI. Pixels per inch, dots per inch. One describes the file, the other describes the printer, and in practice nobody keeps them straight, including print shop employees, so don’t worry about it. What you should worry about is one number: 300. Three hundred pixels for every inch of print. Hit that and your photo comes out sharp. Miss it by a little and things soften. Miss it by a lot and you get my grandparents.
The math is dead simple. Pixels divided by 300 equals your maximum print size in inches. A 3000 x 2400 photo prints cleanly at 10 x 8. Same photo at 20 x 16? Each pixel now covers four times the area and believe me, it shows.
One trap worth flagging before we go further, because I fell into it myself. You’ll find advice online saying “just open the image and change the DPI to 300.” Don’t bother. The DPI number stored in a file is a label, nothing more. Changing 72 to 300 in some settings box adds zero pixels to your photo. It’s like relabeling a small coffee as a large. The cup didn’t grow. What actually matters is pixel count, and the only way to get more pixels is upscaling, which we’ll get to.
Some common sizes:
| Print size | Minimum pixels |
| 4 x 6 in | 1200 x 1800 |
| 8 x 10 in | 2400 x 3000 |
| 11 x 14 in | 3300 x 4200 |
| 16 x 20 in | 4800 x 6000 |
| 24 x 36 in | 7200 x 10800 |
How to tell if your photo is too small
Windows: right-click the file, Properties, Details tab, and the pixel dimensions are right there. Mac: open in Preview, Command + I. Compare against the table. Done.
File size works as a rough signal too, emphasis on rough. Under 1 MB and you’re probably in trouble for anything past a 4×6. A photo straight off a recent phone runs 3 to 8 MB, sometimes more, which usually means there’s enough image resolution in there to print with.
My lazy method, honestly, is zooming to 200% on my laptop and eyeballing it. Chunky at 200% on screen means worse on paper, every time. And for anything expensive like canvas or large format, print a small piece at home first. Two minutes. Learned that one the hard way, obviously.
Why your photo is low resolution in the first place
Worth understanding because sometimes the “fix” is realizing a better copy of the photo exists somewhere and you just haven’t looked.
Social media is the big one. Facebook, Instagram, WhatsApp, all of them compress whatever you upload, and they compress hard, because storage costs money and small images load fast. I actually tested this once out of curiosity. iPhone photo, original file 4032 x 3024 at around 4.5 MB. Uploaded to Facebook, downloaded it back: 2048 x 1536, under a megabyte. Most of the detail, just gone, and the platform never mentions it.
Screenshots have the same issue from a different direction. Screenshotting a photo captures it at your screen’s resolution, 72 to 96 PPI usually, which is roughly a third of print quality. Fine for texting someone. Useless on paper.
Email compresses attachments quietly, depending on the service. Messaging apps compress before sending. Every single crop deletes pixels permanently; crop a group shot down to one face and your 4000-pixel-wide image might be 500 wide now. And old devices simply never captured much to begin with. A photo from a 2011 phone is what it is.
How to fix it
Find the original file
Skip the software for a second. Is there a better copy of this photo somewhere? Usually the answer is yes and everybody skips this step, me included.
Camera roll first. The original tends to still be on the phone that took it, full quality, even when every shared copy got squashed along the way. Google Photos and iCloud keep full-resolution backups; download from the web version of those, not from a text thread. Someone else took the photo? Ask for it over Google Drive or AirDrop. Not WhatsApp.
I once spent twenty minutes fighting with an upscaler before checking Google Photos, where the original had been sitting the entire time. So. Check first.
Use an AI upscaler
Okay, the original genuinely doesn’t exist. Now what.
First understand what regular resizing does, because the difference matters. Dragging an image bigger in Word or PowerPoint or wherever changes nothing about the file. Same pixels, stretched thinner. Blur guaranteed. An AI upscaler is a different animal entirely: it reads the image content, faces and edges and textures, and generates new detail that fits. Output comes out larger and sharper at the same time, which regular resizing physically cannot do.
The one I settled on after trying a few is Artguru, specifically their photo enhancer and image upscaler. What sold me was there’s nothing to configure. Upload the file (JPG, PNG, WebP, whatever), pick 4K or 8K, look at the before/after, download. That’s the entire workflow. No panels, no sliders, no tutorial videos required, which matters to me because I do not have the patience to learn Photoshop for the four times a year I print something.
The grandparents photo went through it and came out big enough for a 16×20 canvas. Genuinely surprised me. The AI also stripped out the grain and tightened up the faces in the same pass. That helps, because a photo that’s bounced around WhatsApp for a while is usually blurry and noisy and small, all three problems stacked, and this handled the stack at once.
Batch mode exists too, up to 200 images at a time. Used it for a photo album for my mom, dumped a whole folder in, walked away, came back to everything done. Browser-based, nothing to install, iPhone app if you want it.
The honest caveat: garbage in, garbage out still applies, just with a higher ceiling. A 100 x 100 thumbnail is not becoming a poster, ever, with any tool. There’s just nothing there to work from. Around 1000 pixels of width or more and results get consistently good.
Photoshop and Lightroom
Already paying Adobe? Photoshop’s built-in route: Image > Image Size, tick Resample, 300 DPI, choose Preserve Details 2.0. Perfectly decent for doubling an image. Past 2x it starts looking plasticky.
Lightroom’s Enhance feature (Photo > Enhance) quadruples pixel count in one click and spits out a DNG. Good when you’re close and need a nudge, like 2000 pixels when you need 3000, that kind of gap.
GIMP (free option)
GIMP resizes for free: Image > Scale Image, enter dimensions, NoHalo interpolation. The results are softer than AI tools and it’s not close, because GIMP is interpolating mathematically rather than understanding anything about the picture. For a 1.5x bump, fine. Beyond that you’ll see it.
Vector conversion (logos only, not photos)
Logos, icons, and text designs are a different situation entirely. Convert those to vector and size stops mattering, since vectors describe shapes with math instead of pixels. Sticker to billboard, same crispness. Illustrator’s Image Trace does it; Inkscape does it free.
Photographs? No. Too much color complexity, comes out looking like a melted painting. Photos get upscaled, graphics get vectorized, that’s the rule.
File formats and color modes
TIFF for zero quality loss, PNG when you need transparency, PDF if a print shop asks for it. JPEG is fine at 90% quality or better with one warning: JPEG degrades a little every single save. Open, edit, save, repeat a few times and the accumulated damage becomes visible. Blotchy patches, soft edges. Do your editing in TIFF or PNG, export to JPEG once at the very end if needed. GIF caps at 256 colors so photos look like a 1994 video game, and WebP was built for web pages, not paper. Avoid both for printing.
Color is the other trap. Monitors mix light: red, green, blue. Printers mix ink: cyan, magenta, yellow, black, aka CMYK. The two systems don’t cover the same territory, and certain colors that glow on screen (neon green, electric blue, hot orange) physically cannot be mixed from ink. They print duller and there’s no fixing that, only anticipating it. Commercial print job? Convert to CMYK in Photoshop beforehand (Image > Mode > CMYK Color) so the preview tells the truth. Home printer? It converts automatically, don’t think about it.
Common mistakes
Pulling images off Google or some website and printing them. Web images run 72 DPI, built for fast loading, hopeless on paper. Stretching a photo bigger inside Canva or Word without upscaling the actual file, which as covered above adds zero pixels. Resaving JPEGs in a loop. Forgetting bleed on edge-to-edge prints (you want about 0.125 inches of extra image per side or trimming eats your design). And skipping the test print, which I keep mentioning because I keep meeting people who, like past me, paid for a big print of a file they never checked.
Before you print: quick check
- Enough pixels for 300 DPI at the target size
- TIFF, PNG, or max-quality JPEG
- CMYK if it’s going to a commercial printer
- Bleed on edge-to-edge designs
- Test printed, or at minimum zoomed way in
Questions people ask me about this
Can I print a 72 DPI image?
Depends entirely on the pixel count, not the 72. A 6000-pixel-wide image labeled 72 DPI prints beautifully at 20 inches. Remember, the DPI tag is just a label. What you can’t do is print a 500-pixel-wide image at any respectable size, whatever its label says. Ignore the DPI field, count the pixels.
Does changing the DPI in Photoshop improve quality?
No, and this might be the single most common misunderstanding in all of photo printing. Changing the DPI value alone (with Resample unchecked) just redistributes the same pixels over a different print size. To actually improve quality you need more pixels, which means resampling in Photoshop or running the image through an AI upscaler.
How much can AI upscaling realistically fix?
My rule of thumb after a lot of trial and error: a photo around 1000 pixels wide upscales to poster-quality reliably. Something at 400 to 800 pixels usually comes out good enough for smaller prints, 8×10 or under. Below maybe 300 pixels you’re gambling. The AI is inventing most of the image at that point and faces especially can drift away from what the person actually looks like.
What resolution do phone photos have? Are they enough for printing?
Recent iPhones and Android flagships shoot at 12 megapixels or more, roughly 4000 x 3000 pixels. At 300 DPI that covers a 13 x 10 inch print straight out of the camera, no upscaling needed. The catch is that number only holds for the original file. The moment the photo passes through WhatsApp or Instagram, all bets are off.
Is 300 DPI always necessary?
For handheld things like photo books, cards, and framed prints on a desk, yes, stick to 300. Large posters and banners viewed from across a room can get away with 150, sometimes less, because viewing distance hides the softness. Billboards famously print at very low DPI and look fine from the highway. If your print hangs on a wall people won’t stand a foot away from, you have more slack than the tables suggest.
Final thoughts
That $18 mosaic of my grandparents was annoying but it forced me to learn all this, and the punchline is that most low-res photos are fixable. Sometimes the original is sitting in your cloud backup waiting for you to look. When it isn’t, an AI tool like Artguru’s image enhancer can rebuild what’s missing. I’m probably fifty-plus photos deep with it at this point and haven’t had a print fail since.
Check the pixels before you spend the money. That’s really the whole lesson. Five minutes with a right-click and a calculator, versus another trip to the trash can.