If you’re tired of blurry photos, you can stop searching now. While many apps promise to sharpen your images, most of them don’t deliver as expected.
This guide cuts through the noise for you. Below are the 3 best and most reliable methods to unblur your photos directly on your iPhone. Let Artguru show you how it’s done.
3 Proven Methods at a Glance
Method 1: Use the iPhone’s built-in Photos App, the most convenient option for basic adjustments.
Method 2: Use a dedicated AI Photo Enhancer like Artguru Photo Enhancer for fast, high-quality and automatic results.
Method 3: Use a professional photo editor like Adobe Lightroom for maximum control and advanced features.
Why Do Your iPhone Photos Get Blurry?
Before we get started, first let’s have a better knowledge of the resolution on your iPhone. It’s a common misunderstanding that blur is a resolution problem. Modern iPhones actually have very high resolution, which means they can capture a lot of detail. High resolution helps prevent a photo from looking “pixelated” or blocky when you zoom in, but it doesn’t stop a photo from being blurry. The real reasons for blur are usually much simpler.
Here are some common factors that would cause the blurriness in your photos when you are using your iPhone to take pictures.
- Shaky Hands (Motion Blur): This is the number one cause. Any small movement from your hands while you press the shutter button can make the whole photo blurry. This effect is much worse in low light because the camera’s shutter needs to stay open longer.
- A Moving Subject: If you’re trying to photograph a running pet, a playing child, or a moving car, your subject might be moving too fast. This will cause the subject to look blurry while the background is sharp.
- Incorrect Focus: Your iPhone might accidentally focus on the wrong thing, like the wall behind your friend instead of your friend’s face. Remember to always tap on your screen to tell the camera exactly what you want to be sharp.
- A Dirty Lens: It’s easy to forget, but fingerprints and smudges on your camera lens are a very common reason for hazy, blurry, and unfocused photos. A quick wipe with a soft cloth often solves the problem.
- Using Digital Zoom: When you pinch to zoom on your iPhone, you are not using a real optical lens. You are simply cropping the image, which throws away data and reduces the quality. This makes the final photo look pixelated and less sharp.
- Low Light Conditions: In dark environments, your iPhone automatically uses a slower shutter speed to let in more light. A slow shutter speed dramatically increases the chance of blur from both shaky hands and moving subjects.
- Compression from Social Media & Messaging Apps: A photo can look perfect in your gallery, but blurry after you send it on WhatsApp or upload it to Instagram. These apps shrink the image file to save data, which reduces its quality and can make it look soft and less sharp.
How to Unblur Photos with the iPhone Photos App
While the Photos app doesn’t have a magic “unblur” button, you can significantly improve the clarity of your pictures using its powerful built-in tools. Follow these simple steps to bring back the detail and make your photos look much sharper.
Step 1: Enter Edit Mode
Open the Photos app on your iPhone and tap on the blurry photo.
Step 2: Access the Adjust Tool
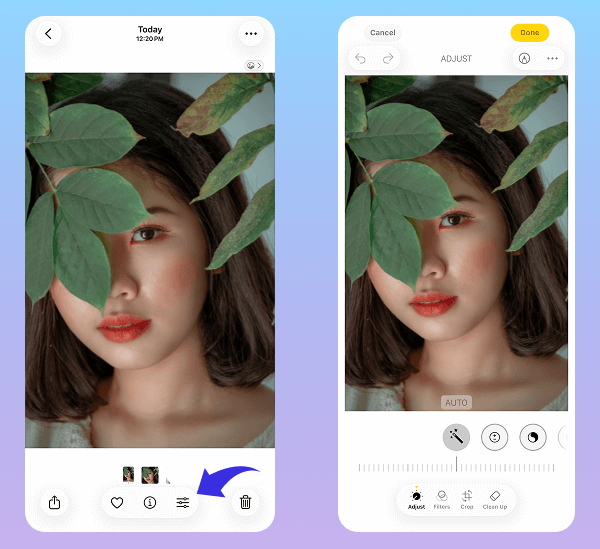
Tap the Adjust icon at the bottom right. This will reveal all the detailed editing sliders.
Step 3: Increase Sharpness
Find Sharpness in the tool slider. Drag the slider to the right to make the edges and details in your image pop.
Tip: A good starting point is usually between +20 and +40. Avoid going too high, as it can look unnatural.
Step 4: Enhance Definition
Next, select Definition. Drag its slider to the right to improve overall clarity and texture.
Tip: A range of +15 to +30 is often enough to see a nice improvement.
Step 5: Compare and Save
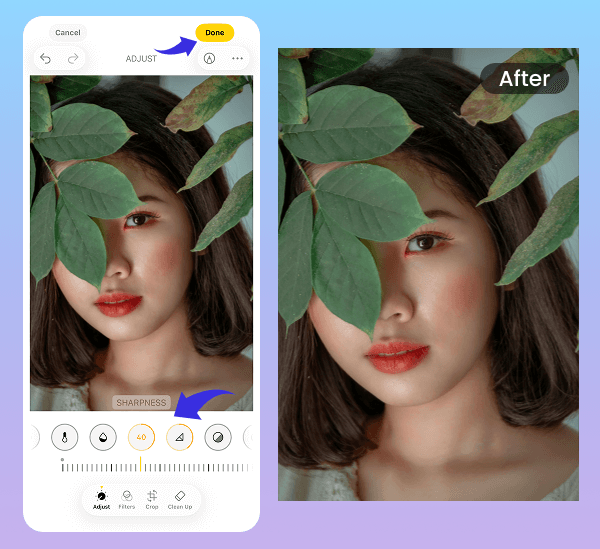
During your edits, you can tap and hold the photo to see the “before” version. Release to see your changes. Once you are satisfied, tap Done to save.
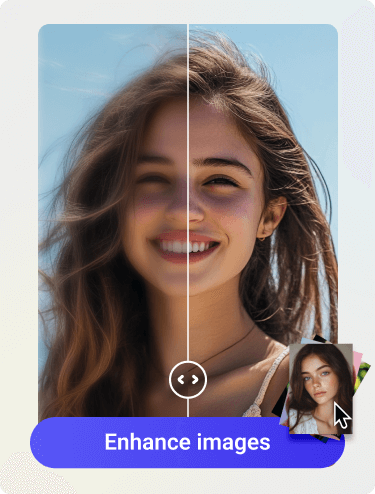
Instantly Make Pictures Clearer with an AI Photo Enhancer
Unlike the manual adjustments in the Photos app where you have to carefully balance different sliders, a dedicated AI Photo Enhancer offers a much simpler path to a high-definition result. You don’t need to spend time figuring out what to adjust; these tools are designed for one-click enhancement. They use powerful AI to automatically make your picture clearer, sharper, and more vibrant.
This is perfect for when you want powerful results without the manual effort. We’ll use Artguru Photo Enhancer as an example to show you how it works.
Step 1: Download Artguru Photo Enhancer
First, download Artguru Photo Enhancer from the App Store. Once it’s installed, open the app.

Step 2: Choose the Photo to Enhance
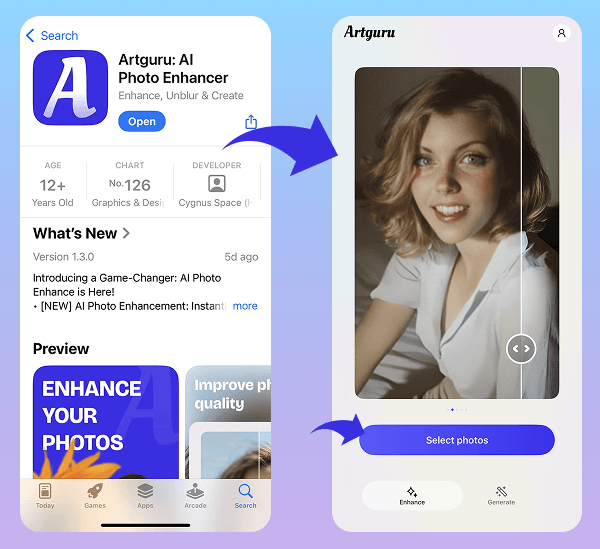
Tap the Select photos button and choose the blurry picture you want to fix from your photo library.
Step 3: Sit Back and Let the AI Work
After you select the photo, Artguru will automatically upload it and begin the enhancement process. The AI will analyze the image, increase its resolution, and sharpen the details. This usually only takes a few seconds.
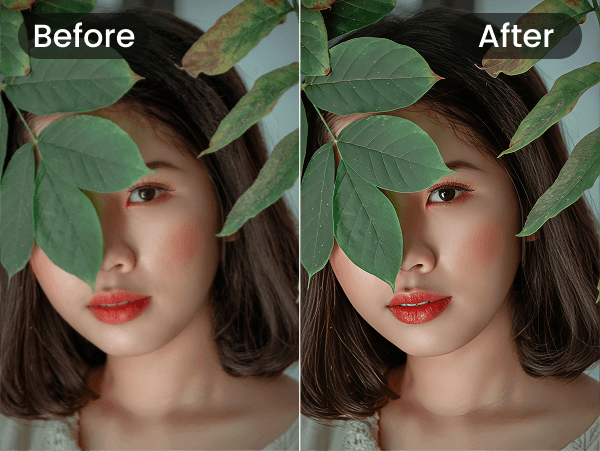
Step 4: Preview the Result
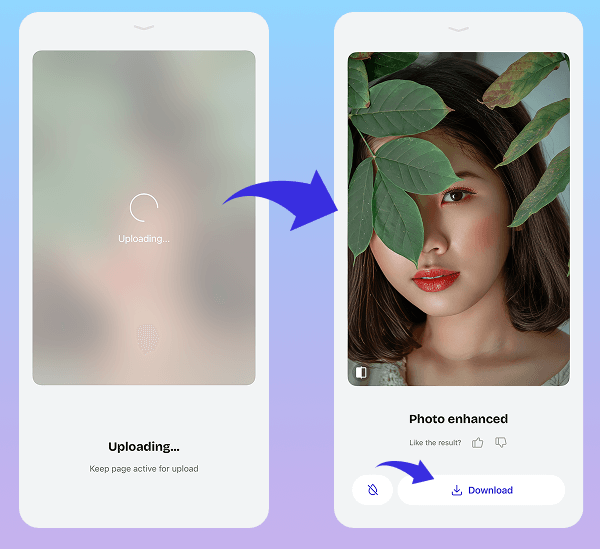
Tap the icon in the bottom-left corner of the photo to compare the before and after, allowing you to see the dramatic improvement in clarity and detail.
Step 5: Save Your Enhanced Photo
If you’re happy with the result, tap the Download button. The new, crystal-clear version of your photo will be saved to your iPhone’s Photos app.
While Artguru is a fantastic option, it’s just one of the many great AI Photo Enhancers available. Each app has its own unique strengths and features. If you’d like to explore more tools, be sure to check out our detailed guide on the Best Photo Enhancer Apps for iPhone.
Fix Blurry Photos on iPhone with Third-Party Photo Editors
For those who want to go beyond one-click fixes and have ultimate control over every detail, a professional photo editor is the way to go. These apps offer a suite of powerful tools that let you fine-tune your image with precision. Unlike automatic enhancers, this method puts you in the driver’s seat.
We’ll use Adobe Lightroom as the example, as it’s an industry standard and one of the best mobile photo editors available.
Step 1: Get the App and Your Photo
Download Adobe Lightroom from the App Store. Once installed, open the app and import the blurry photo you want to fix from your camera roll.
Step 2: Enter the “Adjust” Menu
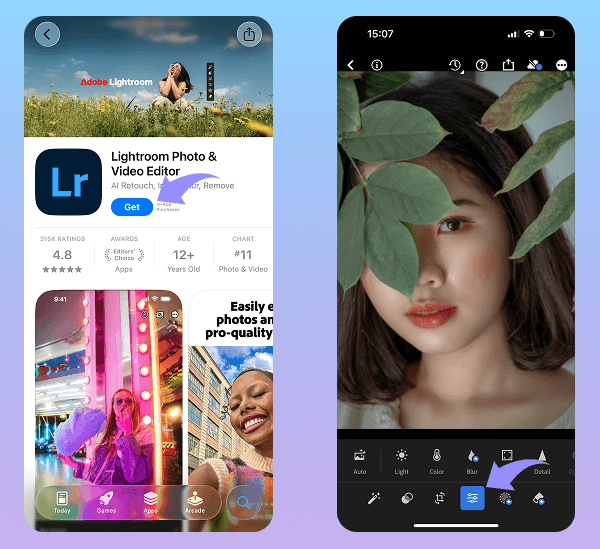
Tap on your photo to open it. At the bottom of the screen, you will find several main categories. Tap on Adjust to reveal the main editing toolbar.
Step 3: Open the “Detail” Panel
In the editing toolbar at the bottom, scroll to the right until you find the Detail section (its icon looks like a triangle). Tap on it to open the sharpening tools.
Step 4: Adjust Sharpening and Other Sliders
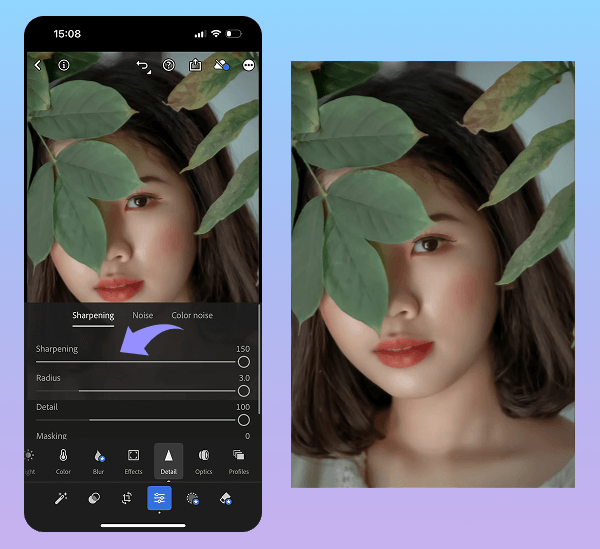
This is where you fix the blur.
- Start by dragging the main “Sharpening” slider to the right. A value between +50 and +80 is a good starting point.
- Next, use the “Radius” and “Detail” sliders for fine-tuning.
- Radius: Keep this value low, typically between 1.0 and 1.5, for a natural look.
- Detail: A setting between 25 and 40 is a great balance for enhancing texture without adding noise.
- Pro Tip: Use the “Masking” slider to apply sharpening only to the edges, which prevents smooth areas like skin or skies from looking grainy.
Step 5: Compare Your Edits
During the process, tap and hold your photo with one finger. This will show you the original “before” image, allowing you to easily compare your progress.
Step 6: Save Your Final Image
Once you are happy with the result, save the final, sharpened image back to your phone’s camera roll.
Final Tips to Get High-Resolution Photos Next Time
The best way to fix a blurry photo is to prevent it from happening in the first place. The key to sharper images often comes down to stability and light. When you’re ready to take a shot, try to hold your iPhone with two hands to keep it as steady as possible, especially in lower light conditions where the camera is more sensitive to movement. Before you press the shutter, always tap on your screen to manually set the focus on your subject. This simple action tells your iPhone exactly what you want to be sharp and can make a world of difference between a soft, amateur shot and a crisp, intentional-looking photo.
Beyond how you hold the camera, a couple of simple habits can preserve the quality of your pictures. First, always make sure your lens is clean; a quick wipe with a soft cloth can solve surprising focus issues caused by fingerprints. Second, avoid the temptation to pinch-to-zoom. Using digital zoom is the fastest way to ruin photo quality because it simply crops and enlarges a portion of the sensor, resulting in a pixelated image. Instead, move closer to your subject physically. Finally, be mindful of how you share your pictures. To maintain the best resolution, share the original file using AirDrop, email, or a cloud service link.
Conclusion
A blurry photo is no longer a lost cause. As we’ve shown, whether you prefer the quick convenience of the built-in Photos app, the one-click power of an AI tool like Artguru Image Enhancer, or the precise control of a professional editor like Adobe Lightroom, there is always a solution. The next time you’re wondering how to unblur a photo on iPhone, you now have a full toolkit at your disposal. Ultimately, by practicing good habits like keeping your phone steady and your lens clean, you’ll capture sharper images from the start. Go ahead and rescue your favorite shots, then capture new, crystal-clear memories with confidence.